Microsoft Entra ID (Azure Active Directory) Provisioning of Users and Teams
- 6 Minutes to read
- Print
- DarkLight
- PDF
Microsoft Entra ID (Azure Active Directory) Provisioning of Users and Teams
- 6 Minutes to read
- Print
- DarkLight
- PDF
Article Summary
Share feedback
Thanks for sharing your feedback!
Microsoft Entra ID (Azure Active Directory) Provisioning is currently in private preview
Introduction
This documentation outlines the process of integrating System for Cross-domain Identity Management (SCIM) and Single Sign-On (SSO) using Microsoft Entra ID (Azure Active Directory).
By following these steps, you can streamline user authentication and management within your organization's identity provider (IdP) in Rivery.
Prerequisites
Before proceeding with the integration, ensure you have the following prerequisites:
- Access to an Microsoft Entra ID (Azure Active Directory) tenant with administrative privileges.
- Access to Rivery utilizing an Enterprise plan account.
Step 1: Configure Microsoft Entra ID New Application
Configuring Microsoft Entra ID for a new application involves creating an app registration in Azure Entra ID, defining its settings like permissions and authentication methods, for the application to authenticate and access resources within your Azure Entra ID tenant. This process enables secure and controlled access to your application by users and services within your organization.
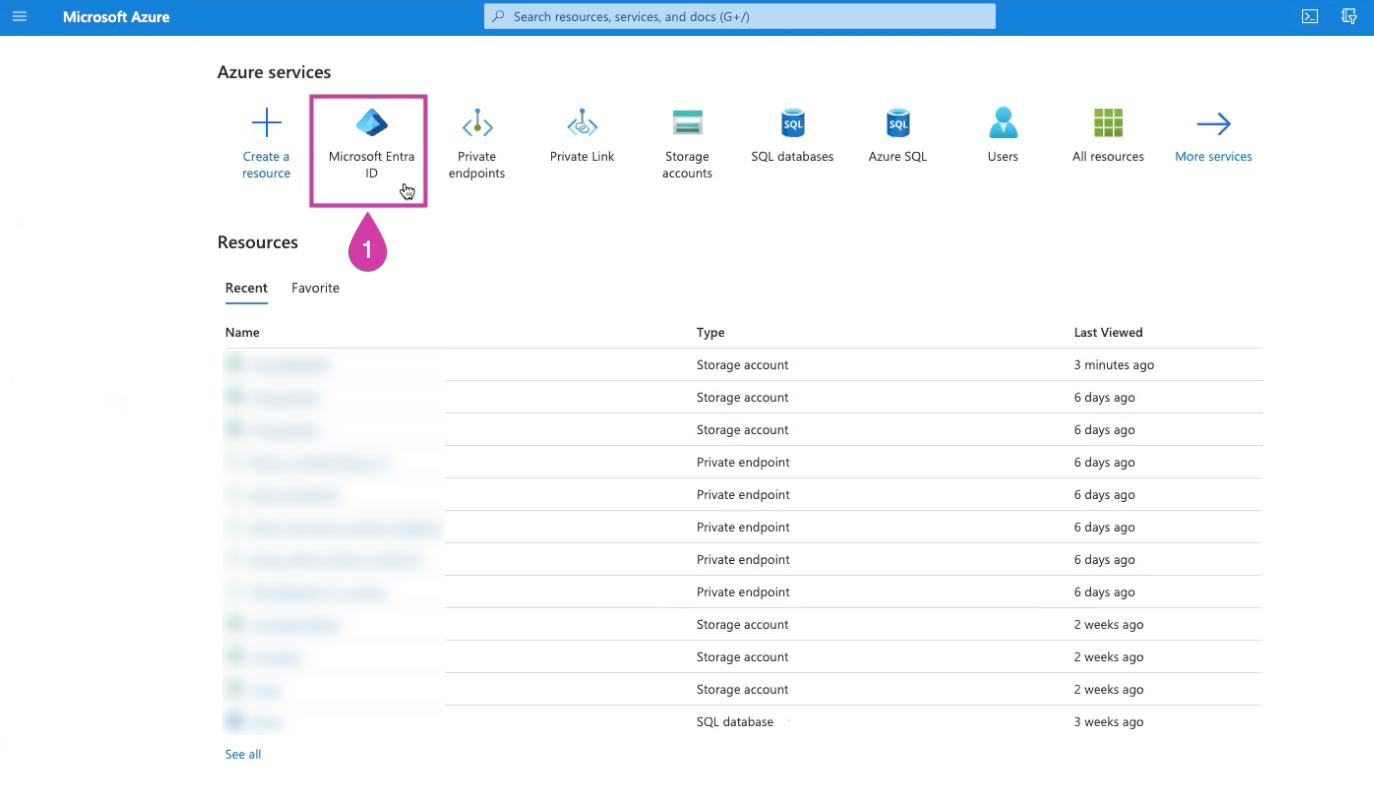
Log in to your Azure Portal and navigate to Entra ID in the top search panel.
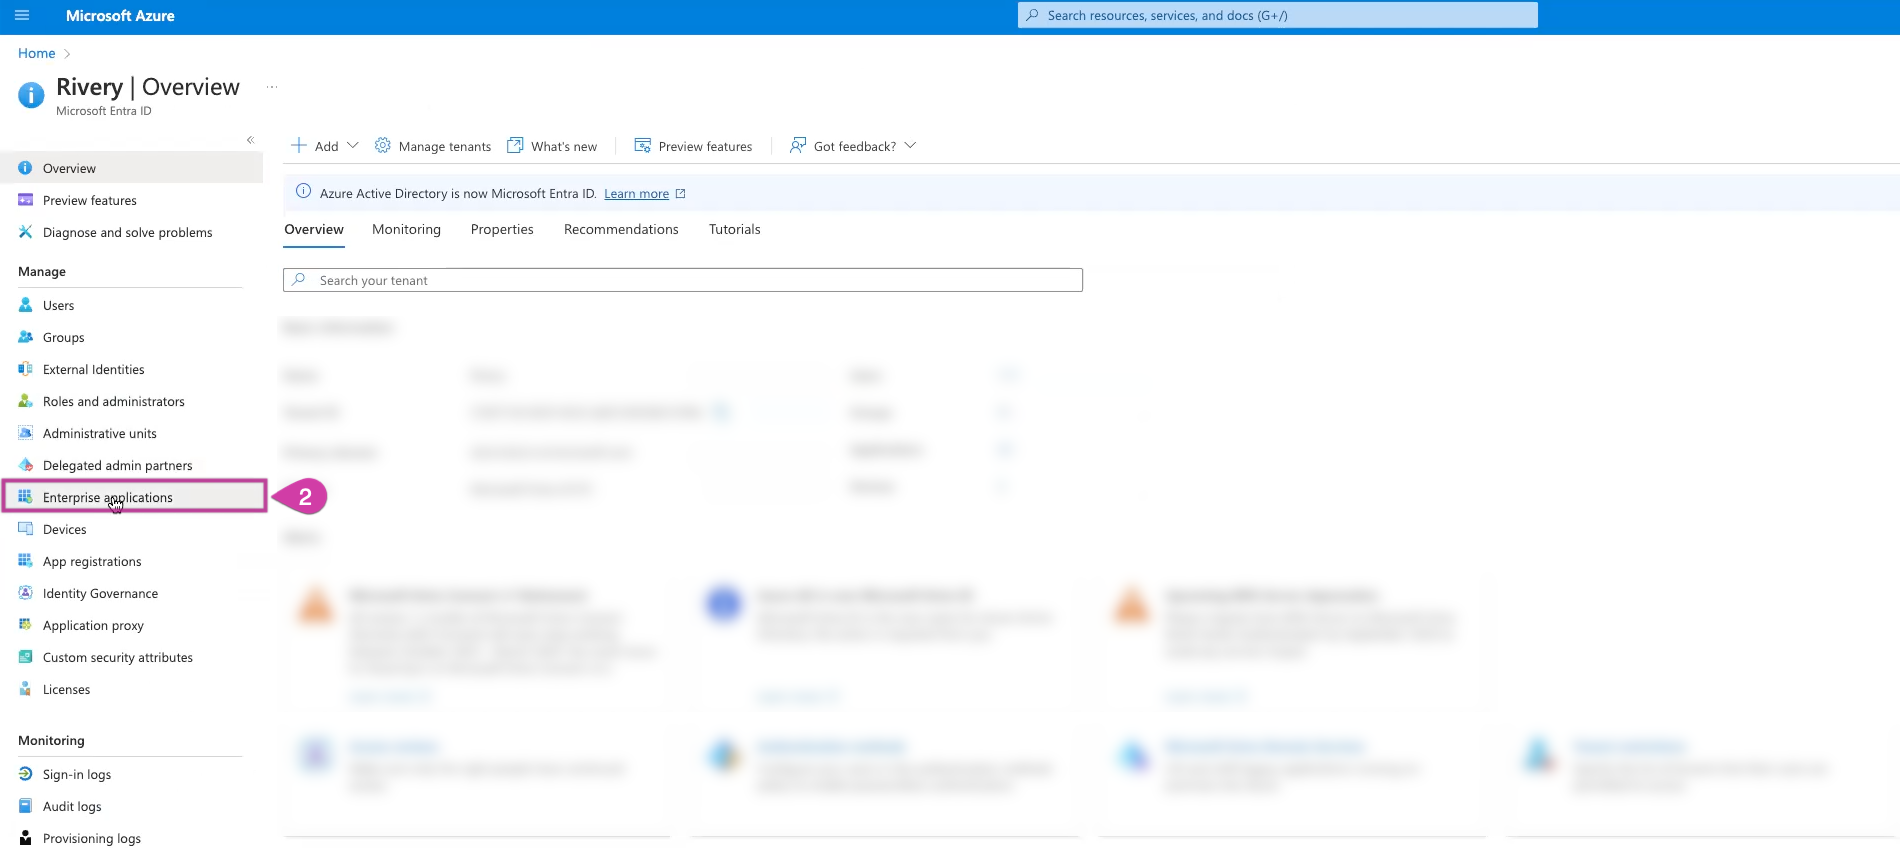
Select Enterprise Applications from the menu on the left-hand side and click on it.
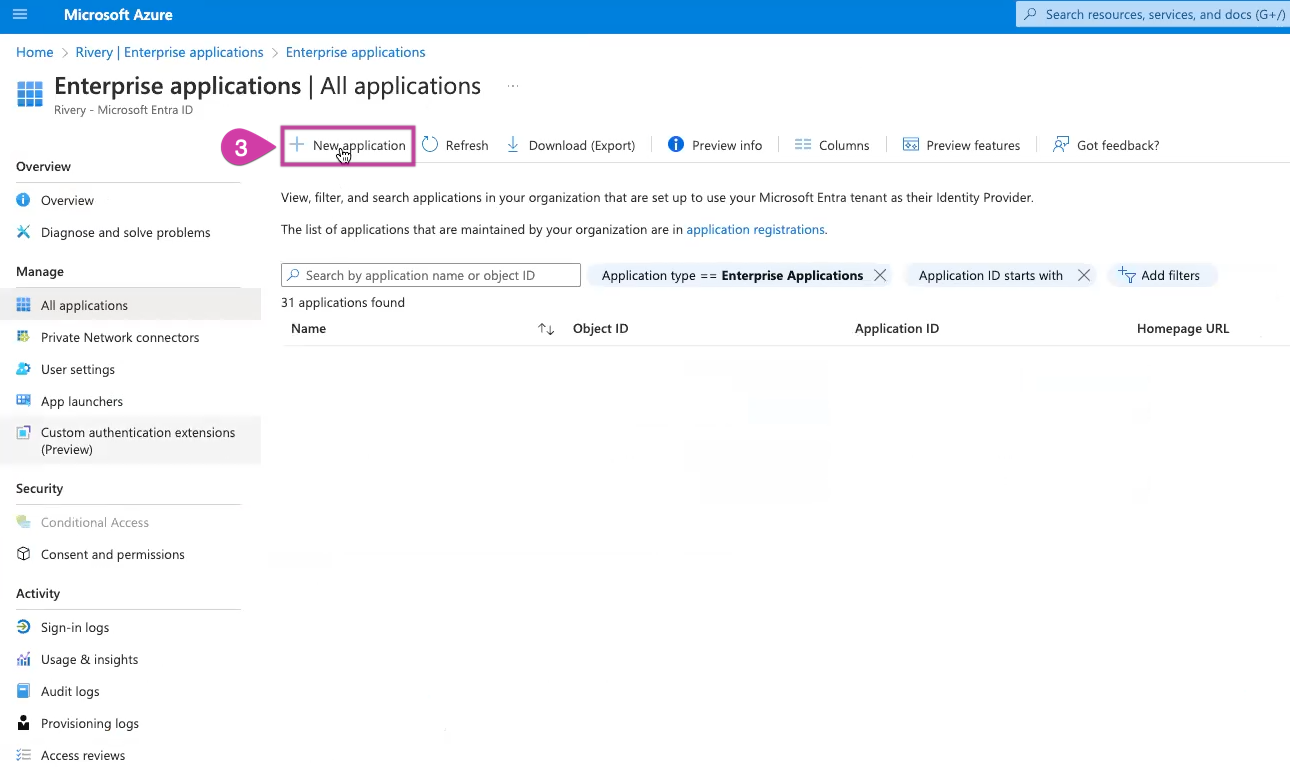
Click on New Application.
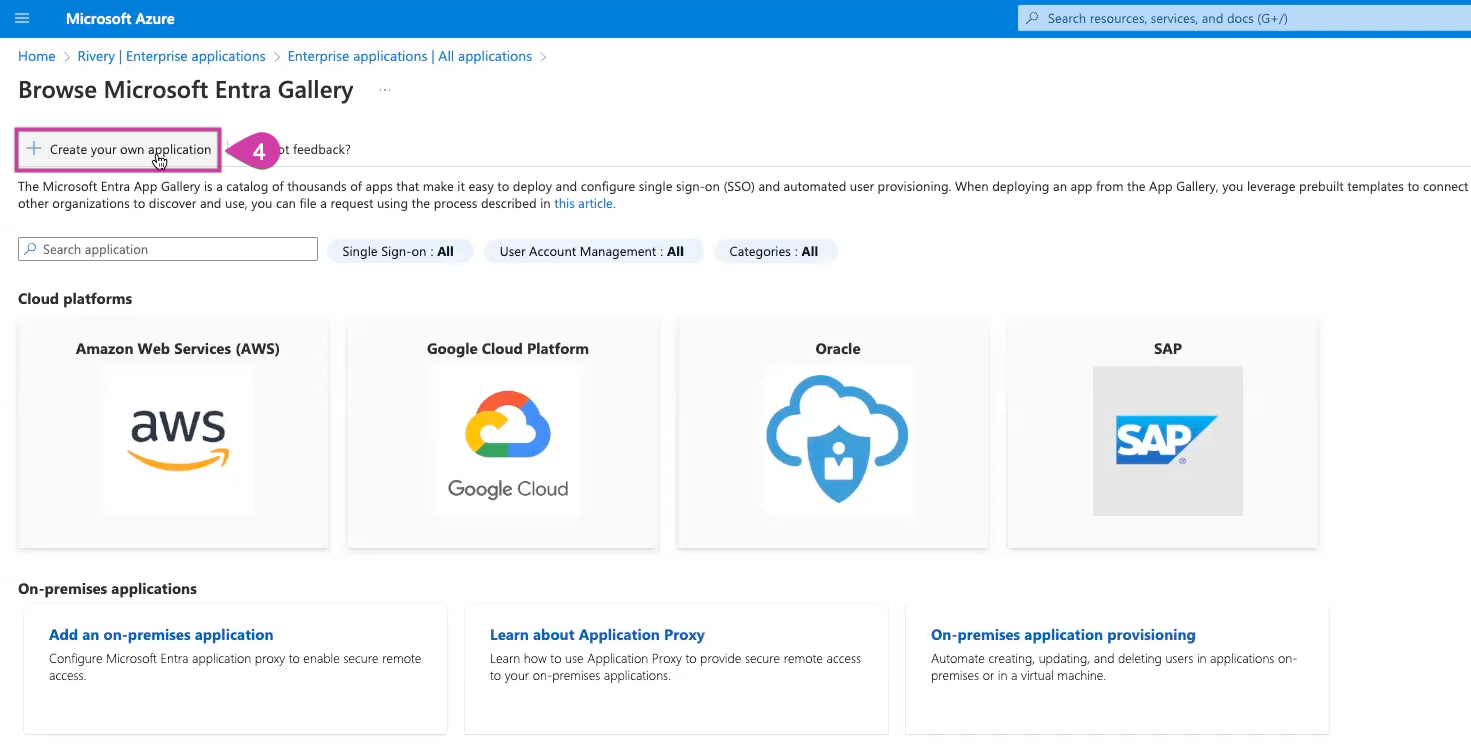
Choose Create your own application.
Name it (e.g., Rivery). and choose "Integrate any other application you don't find in the gallery".


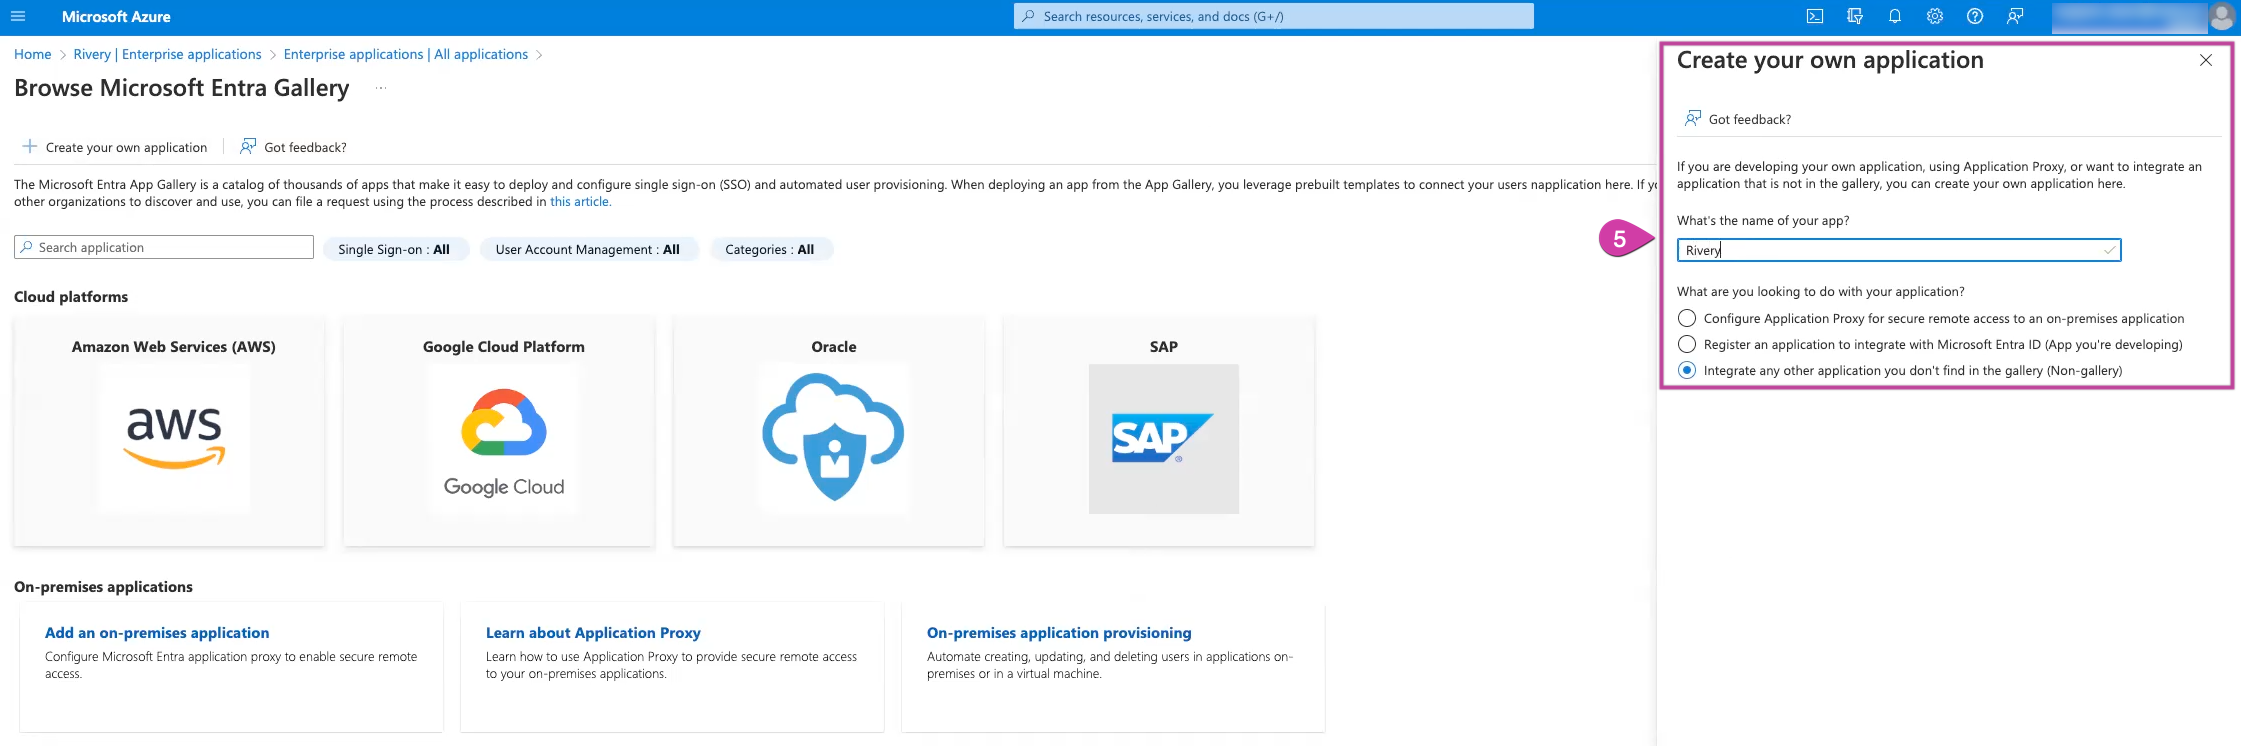
- Select Create and then wait for the process to finish.
Step 2: Configure SCIM Provisioning
Configuring SCIM (System for Cross-domain Identity Management) provisioning involves setting up Azure Entra ID to automate the provisioning and deprovisioning of users and groups in external applications that support SCIM. This process ensures that user accounts and access rights are synchronized between Azure Entra ID and the target applications, reducing manual effort and ensuring consistent identity management across systems.
- In Rivery Console, navigate to Setting in the left hand menu.
- Select Account Settings.

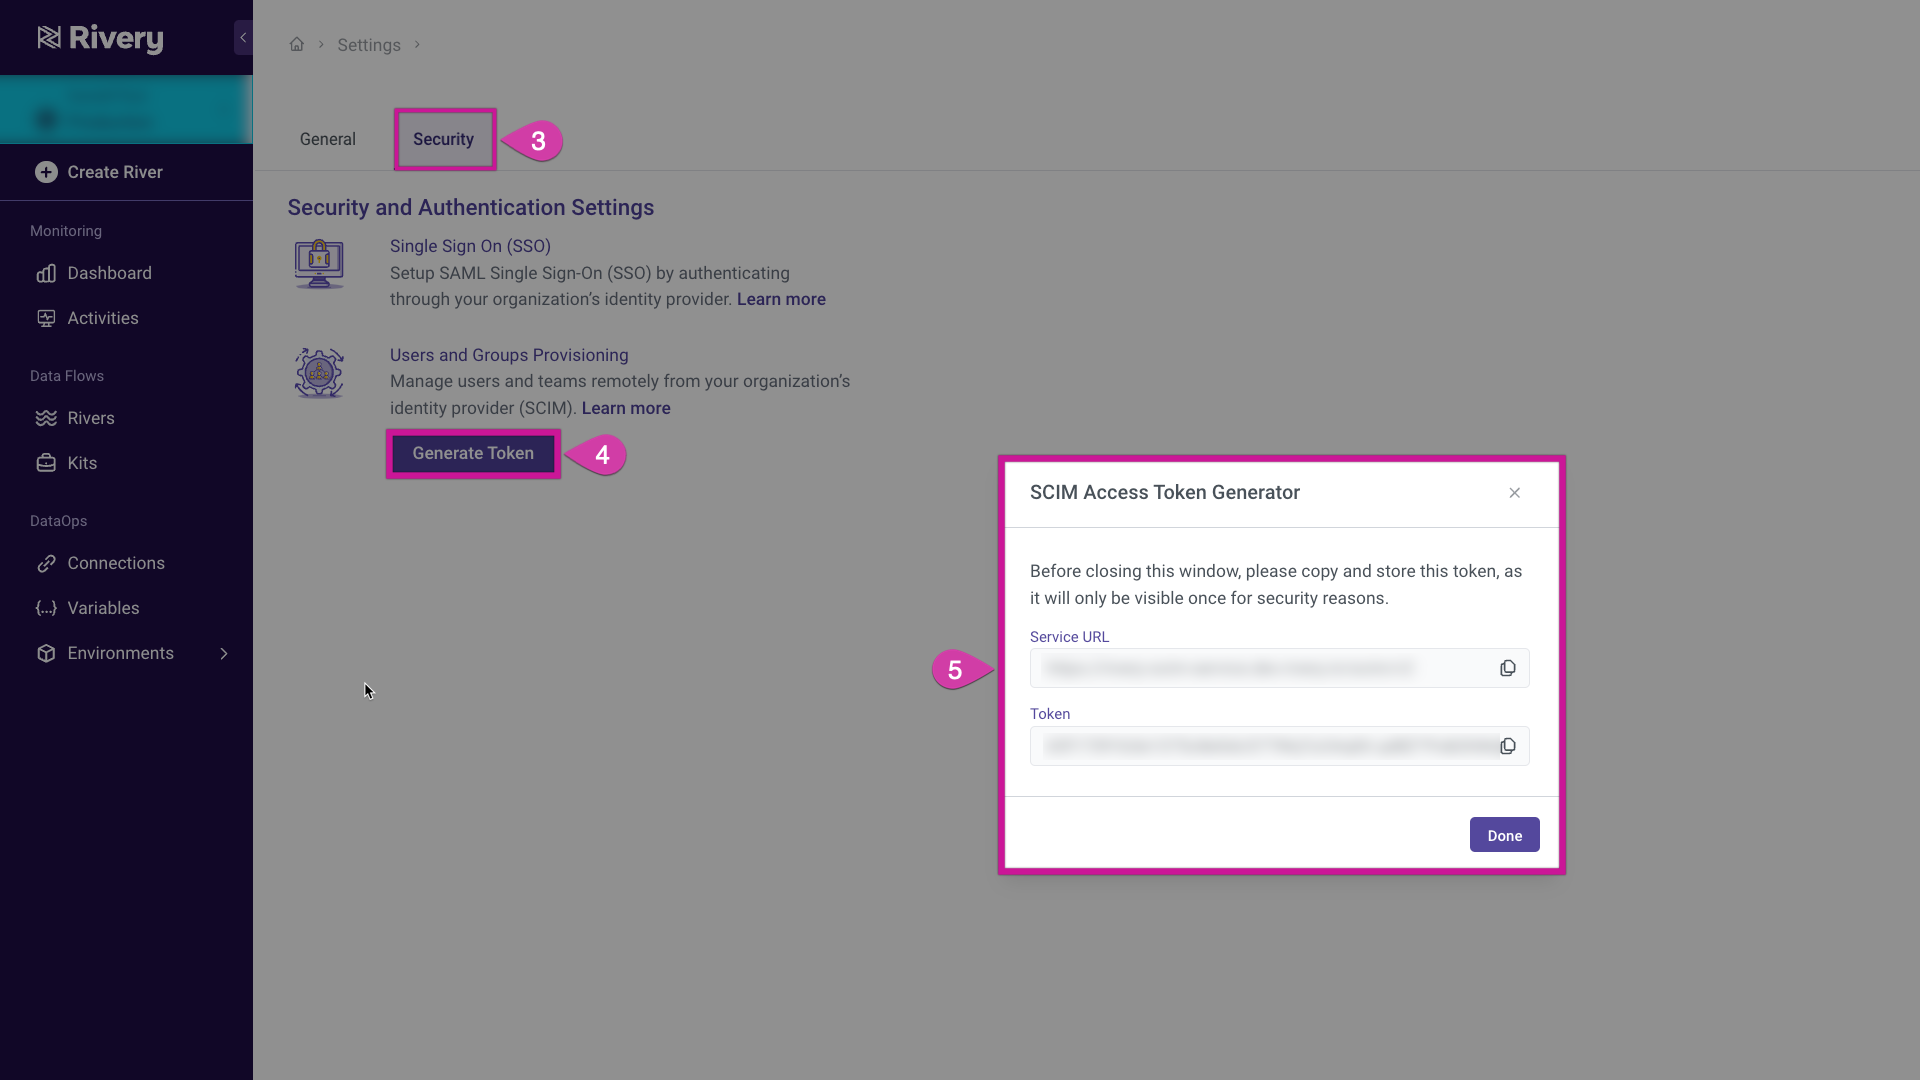
Click the Security tab.
Click on Generate Token located under Users and Groups Provisioning.
Copy the Service URL (Tenant URL) and Token (Secret Token) and store them in a safe location.
Proceed to the Azure portal and in the top search panel, search for Entra ID. Afterward, select "Enterprise applications" from the left menu under the "Manage" section.
Search for the application you created in the application gallery.
In the application overview screen, locate the "Provisioning" section.
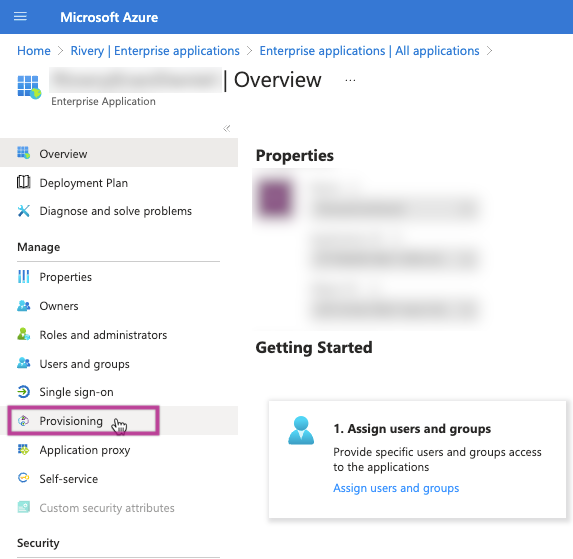
Click on "Get started".
Opt for "Automatic" as the provisioning method.
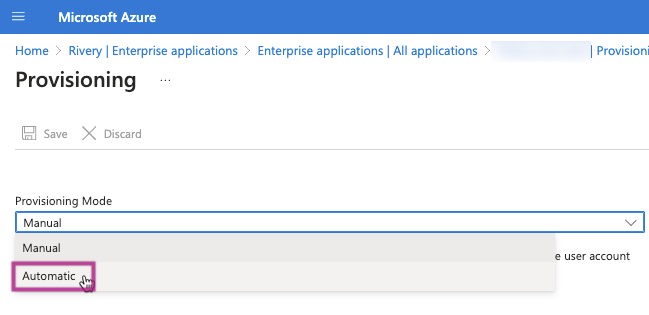
Please input the Service URL (Tenant URL) and Token (Secret Token) that you copied and saved from the Rivery console, for System for Cross-domain Identity Management (SCIM) Provisioning, and then proceed to Test the connection.

If a success notification appears, please proceed with saving the provisioning configuration.
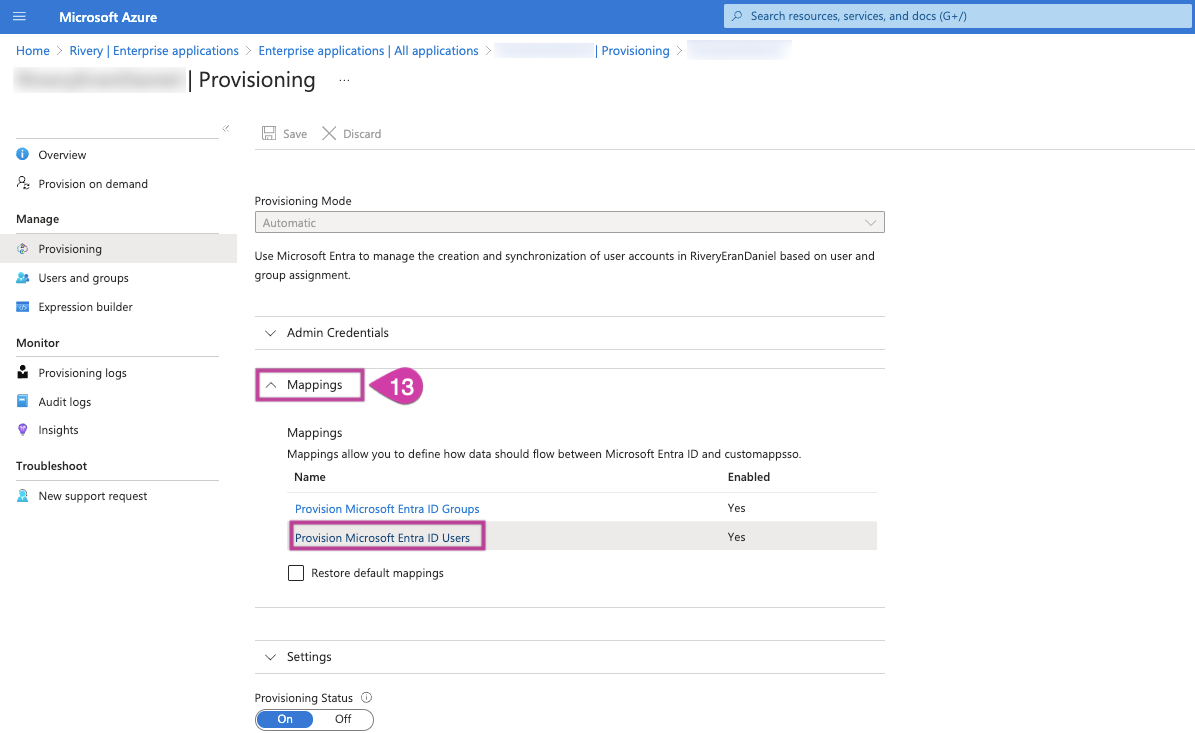
Next, access the Mapping dropdown list and choose the option to Provision Microsoft Entra ID Users.
This list will be populated with numerous Azure Entra ID attributes, but Rivery requires only the following specific attributes:
- userName
- active
- displayName
- emails[type eq "work"].value
- name.givenName
- name.familyName
- name.formatted
- externalId
Feel free to remove any other attributes not mentioned here.


Please Note:
In cases when your “userPrincipalName” attribute does not match the “Email” attribute values for all users, please use “Email” as the Microsoft Entra ID Attribute field for the userName attribute mapping.

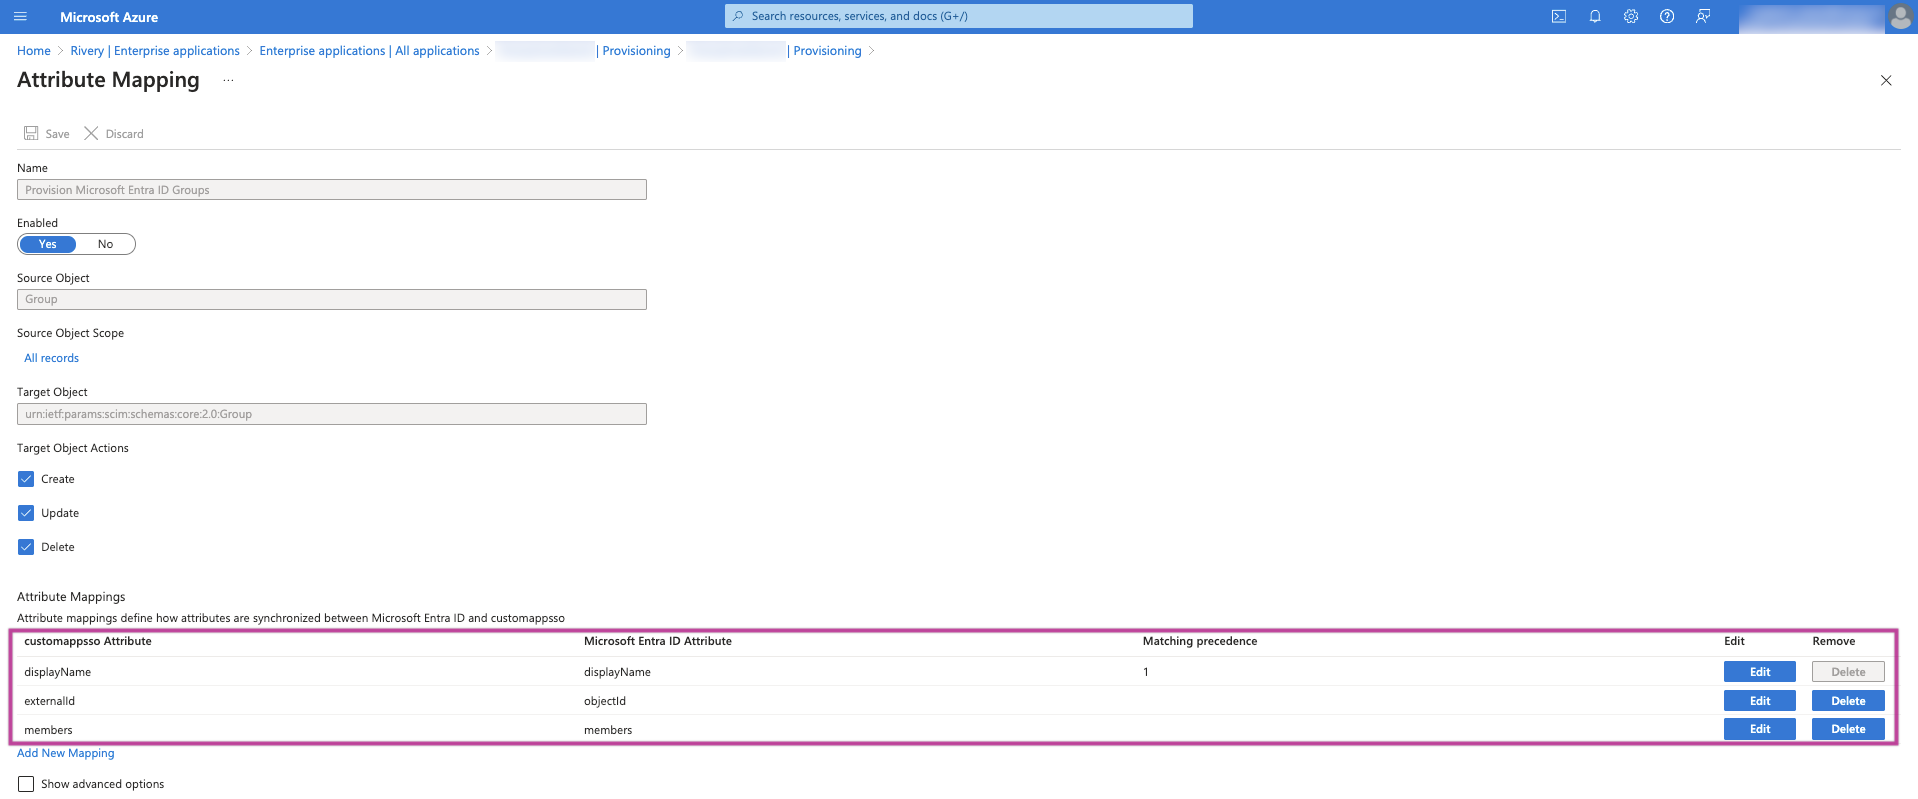
- Now, in the Mapping dropdown list, choose the option to Provision Microsoft Entra ID Groups.
Rivery requires only the following specific attributes:- displayName
- externalId
- members
Feel free to remove any other attributes not mentioned here.

Please Note:
If there are provisioning errors or delays due to your Microsoft Entra ID configuration, you may experience a one-way lockout from Rivery. To avoid this scenario, we recommend designating the Rivery administrator user as 'not provisioned'. This will enable manual configuration of permissions and user management within Rivery by an administrator.
Once these attributes are set, return to the Provisioning section, open the Settings dropdown menu, and choose "Sync only assigned users and groups" under the scope option.
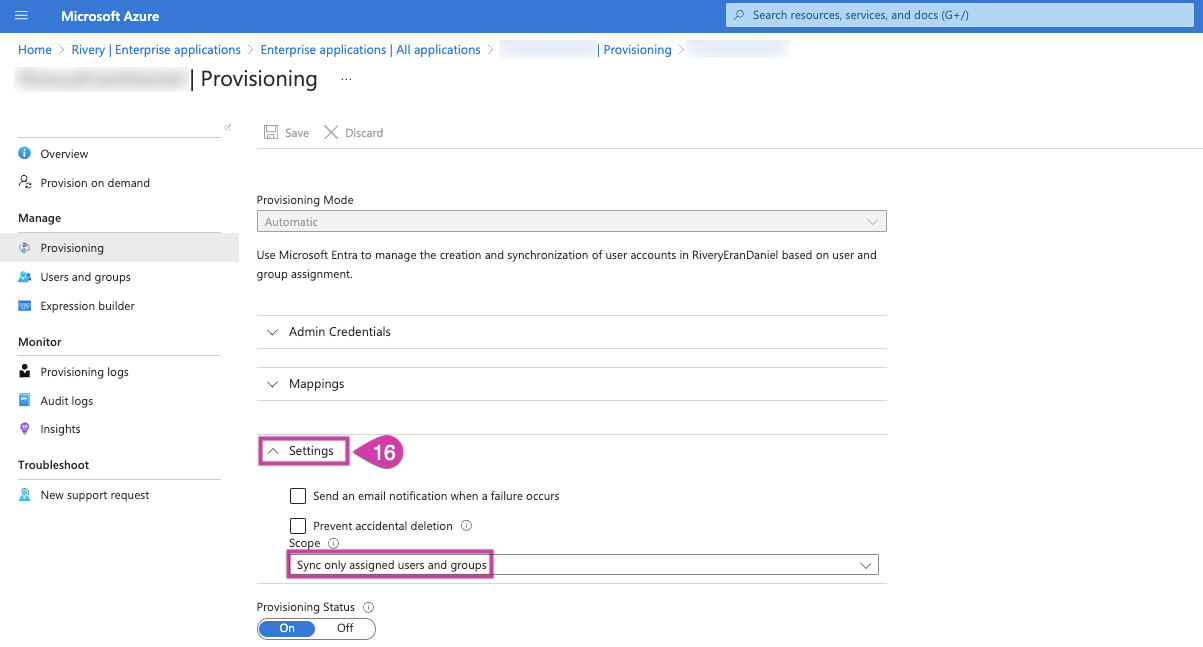
Proceed with saving the provisioning configuration.
Please wait until your Users and Groups are synchronized with Rivery.
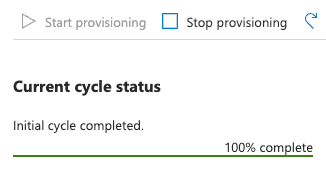


Please note that Azure syncs with Rivery every 40 minutes. Therefore, anticipate any changes to be reflected within that timeframe.
Step 3: Configure Microsoft Entra ID Single Sign-On
With Microsoft Entra ID (Azure Active Directory) Single Sign-On, users can seamlessly access Rivery using their Microsoft Entra ID account.
- Follow the instructions outlined in our Single Sign-On Using Microsoft Entra ID (Azure Active Directory) documentation, beginning from step 7, to set up Microsoft Entra ID SSO and add users to the application.
. - Finalize the setup and establish the connection to Rivery.
Step 4: Configure User and Teams in Rivery
This marks the last step of the process where everything comes together. After setting up steps 1-3, you'll notice that the Users and Teams sections are filled with your Azure Entra ID setups.
Please be aware that when provisioning from Azure Entra ID, the Groups will appear as Teams.
- Now, within the Rivery Console, go to the main menu and click on "Settings," then choose "Users."

- You should find that the Users and Teams tabs are populated with your configurations.
Please note that Azure syncs with Rivery every 40 minutes. Therefore, anticipate any changes to be reflected within that timeframe.

User Management
Adding a New User
Users are generated automatically through Entra ID provisioning, guaranteeing precision and uniformity without manual inclusion in Rivery (the "Add User" feature in the user interface is tailored for including "Rivery" Users who aren't showcased in the Azure Entra ID portal and will only be present within Rivery).
Comprehending User Permissions
User permissions are determined by their respective teams within Entra ID. This indicates that their permissions are dictated by the configurations designated to those teams.
Admin users have the ability to modify team permissions.
Editing a User
Provisioned users are restricted to view-only mode within Rivery and can only be edited in Microsoft Entra ID.
Admin users can only modify the information of Rivery Users (those created in Rivery and not provisioned from Azure Entra ID) such as Name, Email address, and Environments by Selecting "Edit" from the options provided in the right-side menu for each row in the list.
Deactivate or Delete a User
Deactivating or deleting a user is seamlessly managed via the Azure Entra ID portal.
However, if the user is classified as Rivery User, you can deactivate or delete them by using the options provided in the right-side menu for each row in the list.
Associating Rivery Users to Azure Enta ID
Enabling association between a "Rivery" user and a Directory allows you to manage the user and their team memberships using Azure Entra ID. You will establish a connection between this Rivery user and the Directory, granting you the ability to manage both the user and their team memberships through an external directory.
Please Note:
This action is irreversible and will update the user's designation to 'Directory', adjusting their teams and permissions according to the Azure Entra ID settings.
Only after the "Rivery" User is designated as "Directory" (i.e., setting the toggle to true), can the admin add this user to the provisioning. Attempting to do so beforehand may lead to potential errors on your Entra ID side.
If the user logs in via SSO before the provisioning cycle is complete, they will be re-created as a "Rivery" User.
Rivery's functionality relies significantly on the provisioning cycles, with designation modifications taking effect only after a successful provisioning cycle.

Team Management
Adding a New Team
Teams are automatically created through Azure Entra ID provisioning, ensuring accuracy and consistency without the need for manual addition to Rivery. The "Add Team" button in the user interface is designed for adding "Rivery" Teams who are not listed in the Azure Entra ID portal and will exist exclusively within Rivery.
Editing a Team
Admin users can modify team details like Name, Description, and and Environments through the teams management tab by selecting "Edit" from the options available in the row on the right side.

In the Edit Team section, you can set the Environments for your team and view the list of users associated with that team in the Users tab. If the team is provisioned from Microsoft Entra ID, you can still see the list of users in the Users tab, but any editing of team members must be carried out through the Azure interface.

Deactivate or Delete a Team
Teams cannot be deactivated or deleted manually as they are automatically created through Azure provisioning.
Was this article helpful?