


How to build your personalized AI chatbot with Rivery and Amazon Q

Creating AI applications is now more accessible than ever, even if you’re not an AI expert. By leveraging tools like Rivery and Amazon Q, you can set up powerful AI-driven solutions without waiting for full data analytics maturity or hiring a team of AI specialists.
The process doesn’t require complex analytics infrastructure or advanced AI expertise. This guide demonstrates how to integrate Rivery and Amazon Q to build your first AI application effectively.
Providing Context for AI Applications
A critical aspect of creating useful AI applications is providing the right context to the AI engine. Without the correct context, AI can produce inaccurate or misleading responses, a phenomenon known as AI hallucinations. For instance, asking ChatGPT about building a data pipeline in Rivery might yield generic or incorrect information.
A popular way to avoid such issues is to employ a Retrieval Augmented Generation (RAG) workflow. Conceptually, this involves loading specific, relevant data into your AI application to ensure that it generates accurate and contextually appropriate answers. Amazon Q, which is powered by Amazon Bedrock, is designed to seamlessly manage RAG workflows to prevent these issues.
Amazon Q is a generative AI–powered assistant designed to interact with data from your enterprise systems. It helps in answering questions, providing summaries, generating content, and completing tasks securely and efficiently. Think of it as a personalized version of ChatGPT tailored to your enterprise data.
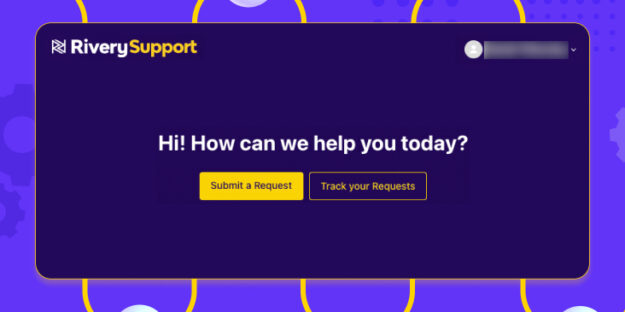
Example Prompt in Amazon Q
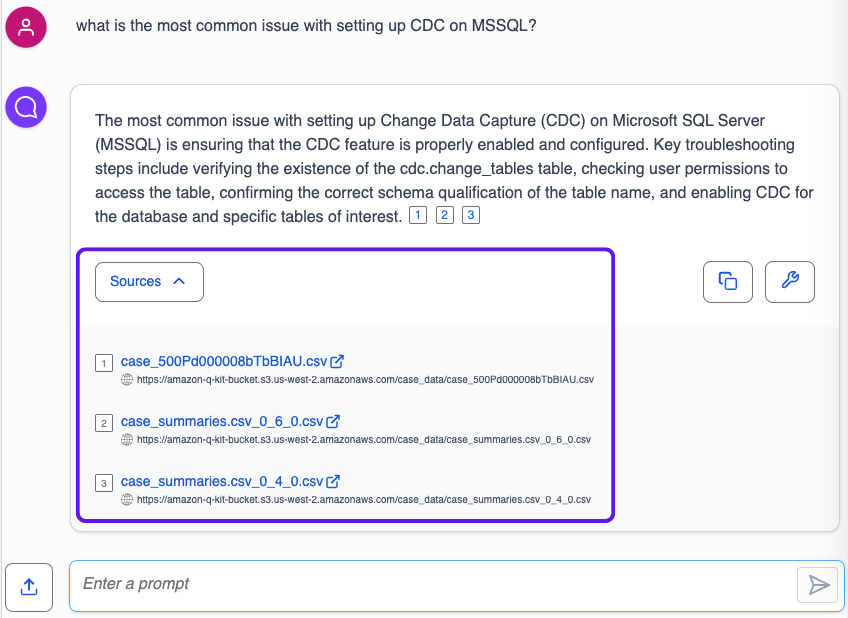
In this example, we will use Amazon Q to help us analyze customer support cases via an AI chatbot. The underlying LLM foundation models used by Amazon Q will enable users to get summarized answers using data from different support cases. This would easily answer questions like:
- What are the steps to solve a certain error?
- What is our most common issue with a certain feature?
- Which support documentation article needs to be improved?
Here is an example of such chatbot in action:
This type of chatbot can help customer support agents quickly and accurately answer customer cases, including automatic responses. It can help you increase customer activation, satisfaction, reduce churn and ultimately save you time and effort.
It’s important to remember that Amazon Q not only provides answers but also includes citations linking to the sources it used to generate the answer. This feature is particularly useful for verifying responses and delving deeper into the provided information. In the example below, you can see the links to 3 different support cases Amazon Q used to construct the answer:
The Set Up Process
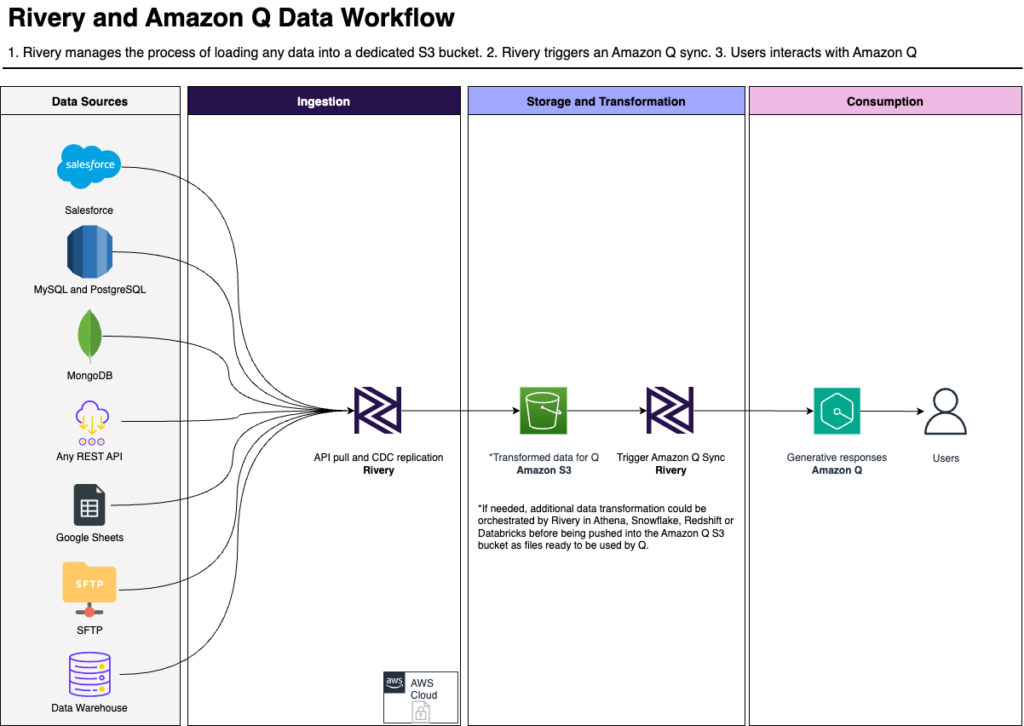
To utilize Amazon Q, you need to load data into the platform. Of course, this is where a platform like Rivery comes into play. Here is a sample data workflow for such process:
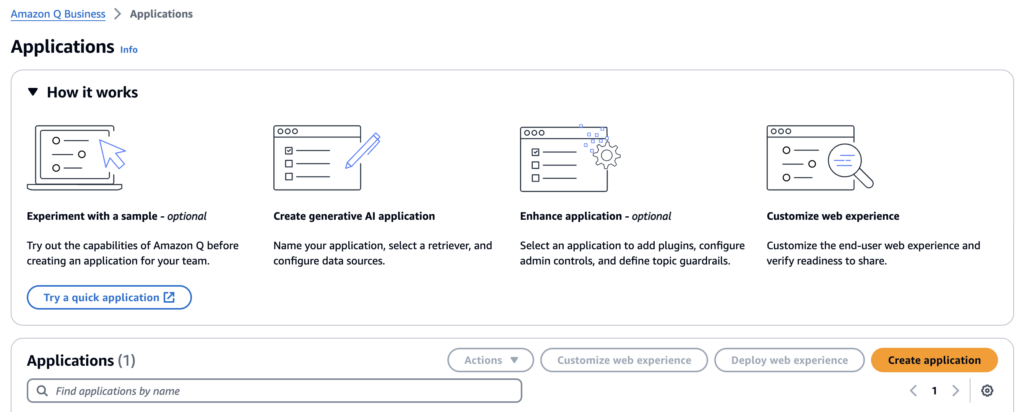
Step 1 – Create an Amazon Q Application and Data Source
Create an Amazon Q Application
Navigate to Amazon Q in your Amazon console, select Applications in the left menu, and choose Create application.
Provide an application name and create a new or select an existing AWS Identity and Access Management (IAM) service role that Amazon Q can assume. Then, choose Create.
Create a Retriever
A retriever pulls data from the index in real time during a conversation. You can choose between two options: use the Amazon Q native retriever or use an existing Amazon Kendra retriever. The native retriever can connect to the Amazon Q supported data sources. Select the native retriever option. Then, choose Next.
Connect Data Source to Amazon Q
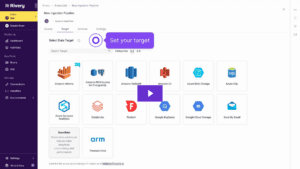
Amazon Q comes with built-in data source connectors. For this setup to work in tandem with any Rivery source, choose Amazon S3 and configure the data source by pointing to the S3 bucket to which you will load data via Rivery pipelines.
In addition to naming the source, identify the S3 bucket to pull from, and set the sync mode.
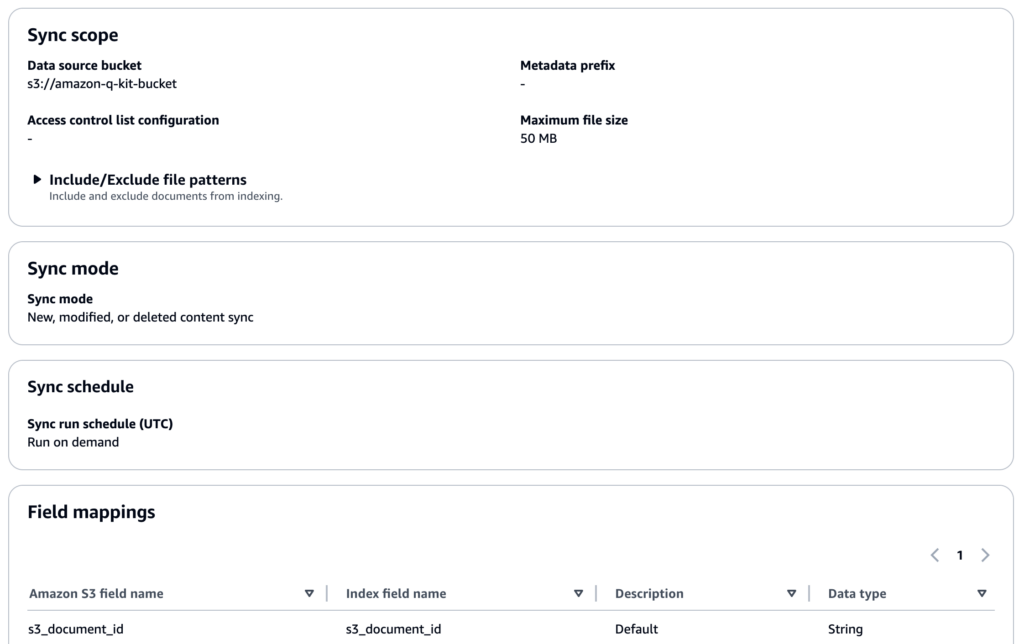
Once the initial configuration is set, click ‘Add data source.’
Step 2 – Load Data with Rivery
Rivery simplifies the process of building data pipelines into Amazon S3. You can create a source-to-target pipeline, or “River”, using Rivery’s extensive integrations with numerous data sources using a few clicks.
For instance, you might choose Salesforce for support tickets but could also use Zendesk, Intercom, or others. After defining the source and target (e.g., S3 or a data warehouse like Redshift or Snowflake), you set up the data load frequency.
If your data can be extracted from the source and uploaded to S3 for Amazon Q to use it as is, you can simply setup your target to use S3.
Alternatively, if you need the data for other purposes, you can also set a different target such as Snowflake, Redshift or other and configure Rivery to use an S3 custom file zone to ensure a copy of data is maintained in S3 along the way. This will ensure your data is uploaded to your final target via your own S3 buckets and will also serve as the Amazon Q data source.
Finally, in the case where you do need to prepare the data before you drop it in S3 as a data source, you could either load it into Amazon Athena, Snowflake, Redshift or other and then use a Rivery logic step to transform the data to your needs.
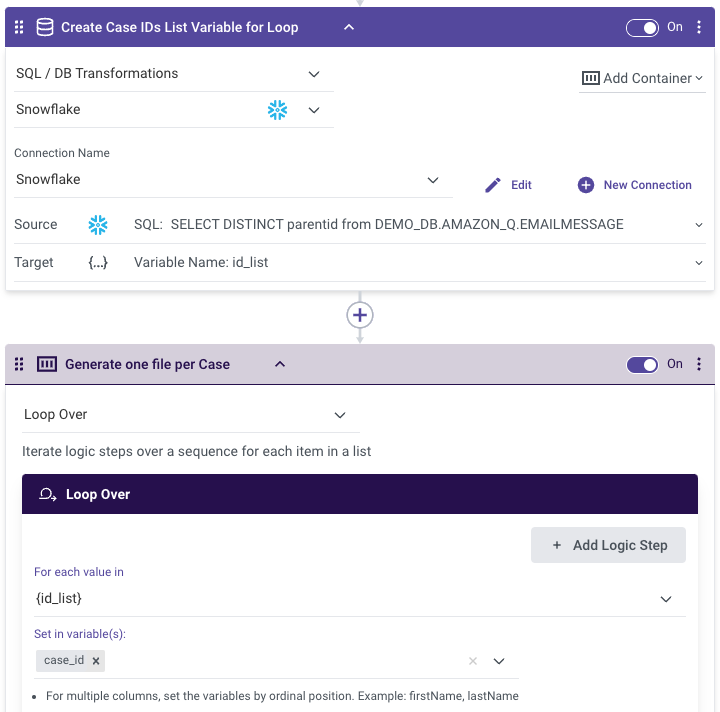
For example, in our scenario we knew that support cases were logged as separate records in our data, each representing a different email exchange as part of the case. To ensure each case is summarized together including all of the emails it involved, we built a Rivery logic river where we looped over the different cases and generated one file export per case.
- Creating the Case IDs list variable and looping over it:

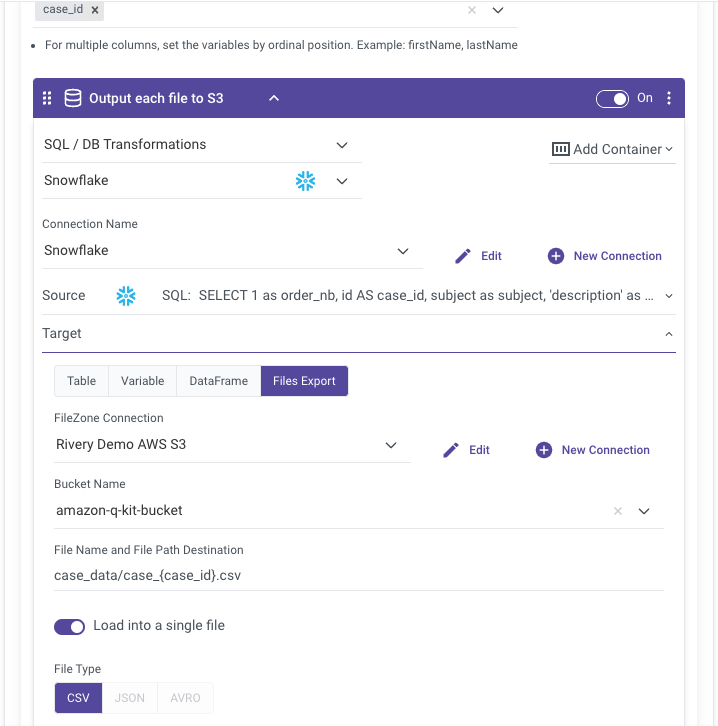
- Running a query to union all the case details per case ID into a single query result and exporting the query result as a file to an Amazon S3 bucket so it can serve as the Amazon Q data source.

Step 3 – Syncing Amazon Q with the latest Data
To keep Amazon Q updated with the latest data, you can use Rivery to automate the sync process. This involves adding a step in your logic river to trigger an Amazon Q sync using a simple Python script. To make it even easier for you, we packaged this Python script in a Rivery kit. By using the kit within your account, you can easily add a step to your logic river in order to trigger the Amazon Q sync.
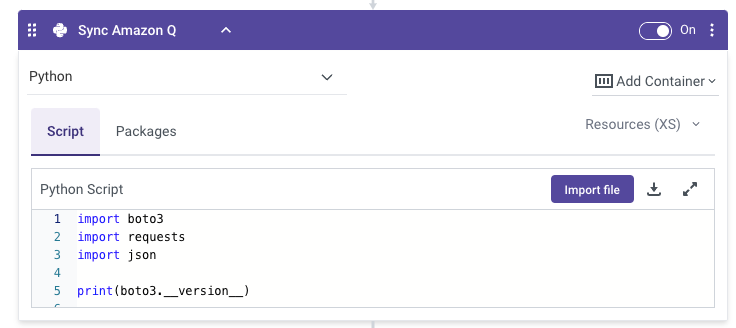
Running this logic river step ensures that Amazon Q always uses the most current data from your S3 bucket.
Moving forward
As you can see, setting up a personalized AI chatbot doesn’t have to be complicated. With the simplicity offered by both Rivery and Amazon Q, it’s really a matter of choosing what data you will be loading into Amazon Q.
With Rivery’s 200+ data integrations, custom connections, and now Rivery Blueprint AI to complete this process without needing to code, you should be able to bring any data with ease. Couple that with the ability to transform the data and prepare it in a way that would be ideal for Amazon Q and finally refreshing the Amazon Q data sync right when the data is loaded and your solution is complete.
By combining Rivery and Amazon Q, you can set up secured and personalized AI applications with your data in just a few steps. It’s time to embrace the power of AI and start building innovative solutions today.
Can't miss insights


Minimize the firefighting. Maximize ROI on pipelines.