


Integrating Hubspot with Snowflake

HubSpot is a leading CRM platform with comprehensive tools for marketing, sales, and customer service automation. It helps you manage customer relationships and improve engagement through targeted campaigns and analytics.
- Comprehensive marketing automation: HubSpot provides robust tools for automating marketing campaigns, from lead nurturing to email marketing and beyond.
- Integrated CRM and sales tools: HubSpot’s platform integrates CRM functionalities with sales tools, streamlining customer interactions and improving sales efficiency.
- Seamless data management: HubSpot allows centralized management of customer data, enabling easy access and utilization across marketing, sales, and service teams.
- Customizable reporting and analytics: HubSpot offers powerful reporting and analytics capabilities, providing insights into marketing performance, sales pipeline, and customer behavior.
Snowflake is a powerful cloud data warehouse known for its scalability and performance. It allows you to store and analyze large volumes of data efficiently in a cloud-native environment.
Here are the 4 main advantages of using Snowflake:
- Advanced marketing automation: Salesforce offers state-of-the-art tools for marketing automation, enabling targeted campaigns and effective email marketing strategies.
- Collaborative environment: Salesforce’s scalable architecture supports seamless collaboration among multiple users, ensuring efficient handling of queries and tasks.
- Efficient data sharing: Salesforce facilitates seamless information sharing across your organization without duplicating or relocating data, enhancing overall efficiency and communication.
- Robust security features: Salesforce prioritizes data security with robust measures like role-based access control and multi-factor authentication, safeguarding your organization’s data integrity.
Integrating HubSpot with Snowflake offers significant advantages if you want to enhance marketing and sales insights through seamless data integration and analytics.
5 Benefits of Integrating HubSpot with Snowflake
1. Unified Customer View
Integrating HubSpot with Snowflake delivers a unified view of customer data across sales, marketing, and support channels. Therefore, this allows you to understand customer behavior—leading to more personalized interactions and improved customer satisfaction.
2. Centralized Data Repository
When you integrate HubSpot with Snowflake, you can centralize data storage and management. As such, this reduces data silos and ensures that all teams have access to accurate and up-to-date information, which leads to better decision-making and collaboration.
3. Improved Sales Pipeline Management
Access to integrated data from HubSpot and Snowflake allows for better management of the sales pipeline. For instance, your sales team can track leads more effectively, identify high-value opportunities, and optimize their sales processes.
4. Customizable Reporting and Dashboards
Integrating HubSpot with Snowflake enables customizable reporting and dashboards that provide real-time insights into marketing and sales performance. You can create tailored reports and visualizations to monitor key metrics and trends, allowing proactive decision-making and strategy adjustments.
5. Cost Efficiency
Integrating HubSpot with Snowflake can also lead to cost efficiencies by streamlining data management processes and reducing the need for manual data handling. With greater efficiency, your team can focus more on strategic initiatives rather than routine—often mundane—data tasks.
How to Integrate HubSpot with Snowflake
Integrating HubSpot with Snowflake is straightforward and can be achieved through various methods. Here are three of the most popular options:
HubSpot’s Snowflake Data Share
HubSpot’s Snowflake Data Share enables secure data sharing between HubSpot’s CRM and Snowflake’s powerful data warehousing platform.
It enables you to synchronize and share data in real-time, ensuring access to up-to-date information for advanced analytics and reporting.
Manually Integrating HubSpot data with Snowflake
You can use the manual method of integration for HubSpot to Snowflake. Nevertheless, it’s more time-consuming than the above method.
The process involves using HubSpot’s API to extract data in JSON format. Once you have the data, define your schema to map each API endpoint to the corresponding table. After setting up the schema, load the data from HubSpot into your Snowflake database.
Alternatively, you can also extract the data from HubSpot and upload it into a S3 bucket for Snowflake to access the data.
Thankfully, using Rivery to transfer data from HubSpot to Snowflake is a more efficient option.
Integrating HubSpot to Snowflake Using Rivery
Integrating HubSpot with Snowflake via Rivery helps data ingestion, transformation, and synchronization.
The process is simple, but you’ll need these prerequisites:
- An active HubSpot account
- An active Snowflake account
- An active Rivery account
Once you have these prerequisites, you’re ready for the first step.
Step 1: Establish a HubSpot Connection
The first step is to establish a HubSpot connection, which is thankfully straightforward.

Follow these steps:
- Enter your Connection Name.
- Click ‘Connect with HubSpot’. Make sure your browser doesn’t block pop-ups.
- Log in as an Admin user.
- Use the Test Connection function to see if your connection is up to the task.
Once you’ve followed this step, you can start to pull important data from HubSpot.
Step 2: Pull Data from HubSpot
Now you’ve created a connection, choose HubSpot as your source connection. You can then select two options: predefined reports or custom reports.
For predefined reports, Rivery provides a convenient entry point—including concise data description, a list of customizable fields, and schema mapping. For custom reports, choose a specific report to pull data from on HubSpot.
The options include:
- Deals (including modified deals)
- Companies (Only this report is compatible with Version 2)
- Contacts
- Pipelines
- Email Events
- Owners
- Engagements
- Recent Engagements
- Forms
- Workflows
- Campaign Data
- Tickets
- Marketing Emails
- Products
- Line Items
For detailed information on pulling data from emails, deals, contacts, and more—check out our comprehensive guide.
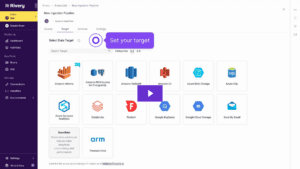
Step 3: Set Snowflake as your Target

You can now set Snowflake as your target once you’ve successfully started to pull data from HubSpot. Here’s how:
Basic Authentication:
- Go to the Connections Menu in Rivery.
- In Snowflake Connection form type in your Connection Name.
- Choose the Basic Authentication Type.
- Enter your Username and Password.
- Select the name of your Warehouse (mandatory).
- Enter the name of your Role (optional).
- Input your Account Name.
- Select your Custom FileZone to save the data in your staging area.
- Then, use the Test Connection option to check if the connection is working. If successful, you’re ready to pipe data to Snowflake by using this connection.
Key-Pair Authentication:
1. Open a Terminal window to generate a private key (Windows is not supported).
2. Enter the following key into your terminal window to download the key file.
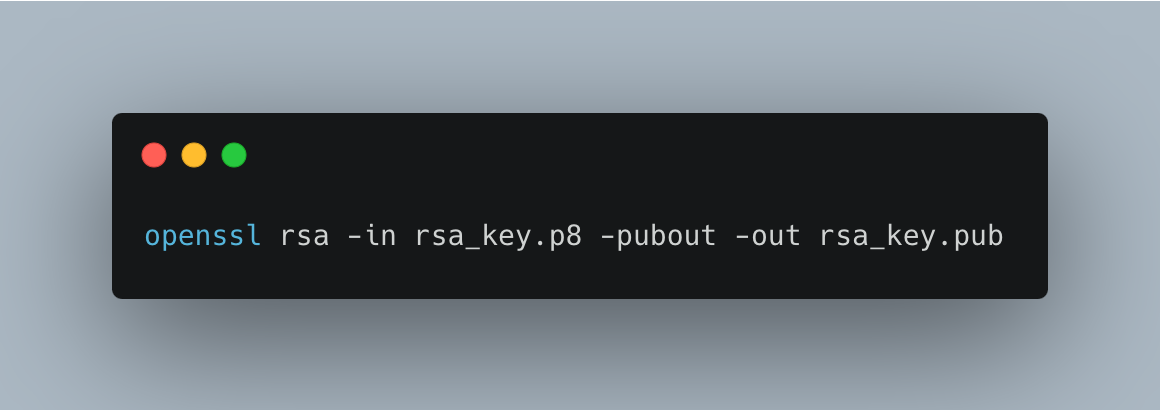
3. Run this command to create an unencrypted version of the key:

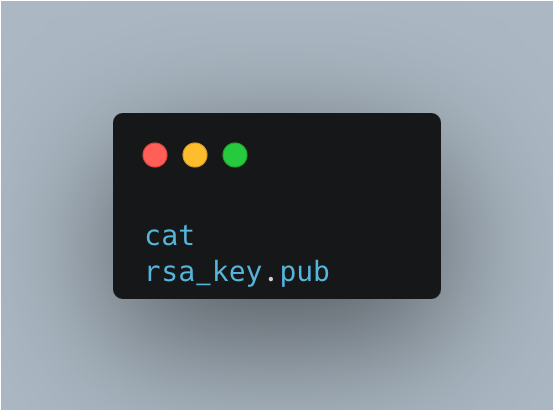
4. You should create the public key by referencing the private key:
5. That will enable you to create a private key in PEM (Privacy Enhanced Mail).
6. Run the ALTER USER command in your Snowflake control to assign the public key to a Snowflake user:
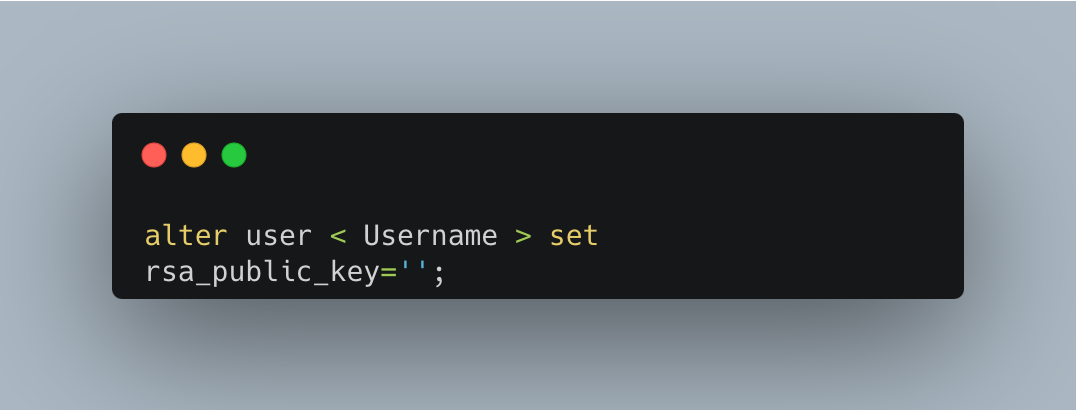
7. Copy the PEM format from Step 5 and paste it between the apostrophes in the snowflake console code:
8. Go to the Rivery connections menu:
9. Complete the Snowflake Connection form with the following information:
- Type in the Connection Name.
- Select the Key-Pair Authentication Type.
- Enter your Username.
- Enter the name of your Warehouse (mandatory).
- Enter the name of your Role (optional).
- Input your Account Name.
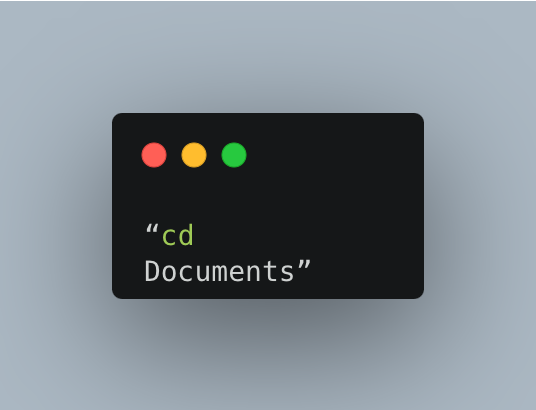
10. Pull the rsa_key.p8 file from your Documents folder to the label
11. Set your Custom FileZone to save data in your chosen staging area (optional).
12. Try the test connection function to see whether the connection works. If so, you can use the connection in Rivery.
Moving Forward
Integrating HubSpot with Snowflake enhances marketing and sales capabilities by providing a unified view of customer data, centralized data management, improved sales pipeline management, customizable reporting, and cost efficiencies.
With the help of Rivery, you can ETL from HubSpot to Snowflake in seconds without requiring code.


Minimize the firefighting. Maximize ROI on pipelines.